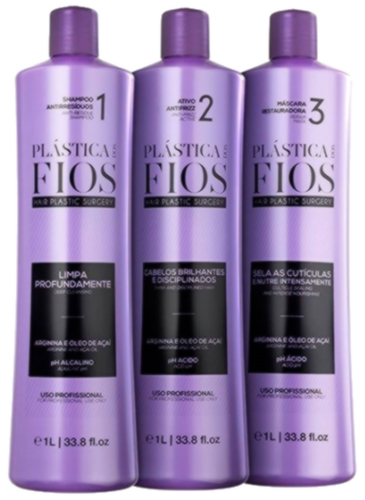
Set Plastica dos Fios Professional 1000/1000/1000 ml
Step 1: preparatory shampoo 1000 ml
Step 2: keratin straightening product 1000 ml
Step 3: moisturizing mask 1000 ml
Advantages of Plastica dos Fios
After the procedure, you get a natural look without signs of hair stretching.
Maximum comfortable procedure for both the client and the master, since there is no smell.
1. Revitalizing mask Cadiveu Professional Plástica dos Fios 1000 ml: promotes maximum hair hydration, reducing frizz and emphasizing the smoothness effect. Action: Acai oil: its antioxidant effect protects and regenerates hair, and also provides effective and long-lasting hydration. Arginine: ensures the exchange of nutrients between the root and the strands, forms a protective film that covers the scales and strengthens the hair.
2. Acetic Acid Shampoo: Because it has an acidic pH, it can cause irritation and flaking on sensitive skin. For this reason, we recommend not to use by pregnant women, people with sensitive skin and children under 12 years of age. Note.
Method of application: Recommendations for application Materials needed: silicone gloves, hair dryer, iron, plastic clips, fine-tooth comb, brush and plastic container.
1. Wash your hair with Pre Treatment Shampoo, massaging until foam forms. Wash virgin, very stubborn or very dirty hair twice. Let it sit for 5 minutes and rinse off completely. Attention: do not rub your scalp.
2. Dry your hair 80% using a hair dryer and your fingers.
3. Divide your hair into 6 sections (a vertical line dividing the hair into two sections - right and left - and 3 horizontal sections - back, middle and front of the ears). Secure each session into a bun with a clip.
4. Pour 20 to 40 ml Heat Seal into the container and put on silicone gloves.
5. Start applying with a brush to a section of the back of your neck. Place two fingers from the root to the base of the strand and use a comb to pull the product out to the ends. Make sure the product is on all strands.
6- Repeat the procedure with the strand on the side.
7. Turn on the hairdryer on a cold stream and dry two strands 100%. It is important to dry two strands of hair at the same time using a cold jet. This prevents the formation of smoke and prevents the product from evaporating without effect.
8. Repeat procedure 5 to 7 on the two central strands of hair, one at a time.
9. Finally, repeat steps 5 to 7 on the front two sections of hair, drying the sections backwards. It is important that neither the wind from the hair dryer nor the wick with the product come into contact with the face.
10. Ironing time! For light, damaged or chemically treated hair, the ironing temperature should not exceed 200°C. For normal, virgin or heat-resistant hair, the temperature should be 230°C.
11. Separate your hair into sections using clips. Take a thin linear strand and iron along the length (without ends) of the strand 10 times (board at 200°C) or 7 times (board at 230°C).
12. Iron the ends (without length) of hair up to 4 times (board at 200°C) or 2 times (board at 230°C). This way you will avoid the effect of artificial smoothness at the ends.
13. Repeat this process (steps 11 and 12) for all hair strands. Ironing straight to the skin makes strands smoother from the root. 14. After flat ironing all strands, rinse your hair well.
15. Apply the Revitalizing Mask to your strands, gently massaging the strands. Let it sit for 5 minutes and rinse again. 16. Blow dry your hair
The procedure pays off well: 1 liter of product is enough for 35 procedures.
🌍 Worldwide shipping from Brazil
📦 Ships within 1–2 business days if in stock
🚚 Estimated delivery: 5–10 business days after dispatch
🔎 Tracking number provided after shipment
💳 Secure payment: Stripe / PayPal
⚠️ Import duties and taxes may apply depending on your country
✅ Delivery guarantee: reshipment or refund in case of confirmed loss